Expert tips, techniques, and insights from our master craftsman
Discover the step-by-step process professional craftsmen use to transform worn furniture into beautiful pieces. From assessment to final finish, learn the secrets of expert refinishing techniques that preserve character while restoring beauty.
Furniture refinishing is both an art and a science, requiring patience, skill, and attention to detail. Whether you're dealing with a family heirloom or a thrift store find, understanding the proper process ensures beautiful, long-lasting results.
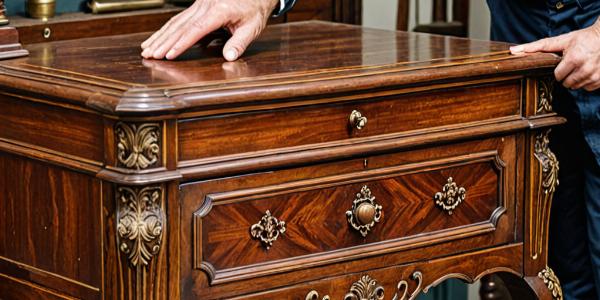
Before beginning any refinishing project, thorough assessment is crucial. We examine the piece for structural integrity, identify the wood species, and determine the existing finish type. This information guides our approach and material selection.
Removing old finish can be achieved through chemical stripping, sanding, or heat application. Each method has its place depending on the finish type and wood condition. Chemical stripping is often gentler on delicate details, while sanding may be necessary for heavily damaged surfaces.
Once stripped, the wood surface is carefully inspected for damage. Scratches, dents, and gouges are repaired using appropriate wood fillers or traditional techniques. The surface is then sanded progressively through various grits to achieve smoothness.
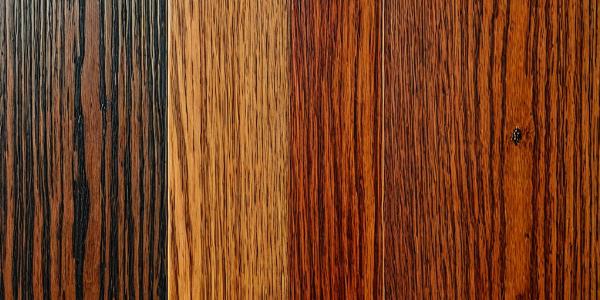
Stain selection depends on the desired final appearance and wood characteristics. Penetrating stains enhance natural grain patterns, while gel stains provide more uniform color. Proper application technique ensures even coverage without blotching.
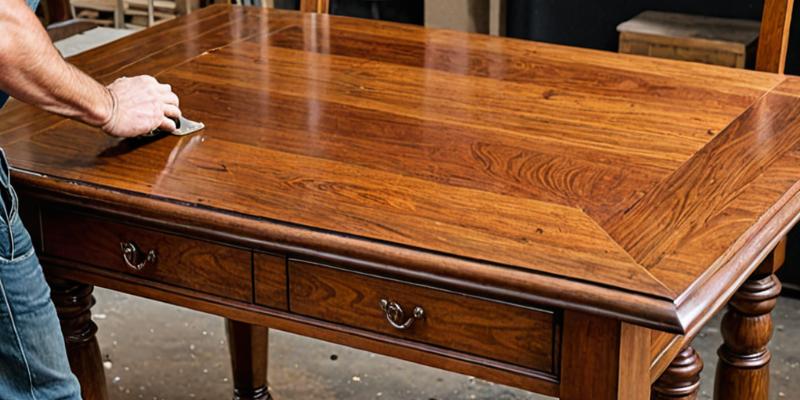
The final finish protects the wood while enhancing its beauty. Options include lacquer, polyurethane, shellac, or oil finishes. Each provides different characteristics in terms of durability, appearance, and maintenance requirements.
Remember, refinishing furniture requires patience and practice. While DIY approaches work for simple projects, complex or valuable pieces benefit from professional expertise to ensure the best possible outcome.
Expert guidance for furniture care and restoration
Learn proper techniques for maintaining antique furniture value while ensuring pieces remain functional for daily use. Discover cleaning methods, environmental controls, and when to seek professional help.
Antique furniture represents both historical significance and financial investment. Proper care not only preserves these pieces for future generations but also maintains their monetary value. The key is balancing preservation with practical use.
Regular dusting with clean, soft cloths prevents buildup that can scratch finishes. Use furniture wax sparingly, no more than twice yearly, as over-waxing creates buildup. Avoid commercial furniture polishes containing silicone, which can damage original finishes.
Maintain stable temperature and humidity levels. Ideal conditions are 65-75°F with 45-55% humidity. Avoid placing antiques near heat sources, air vents, or in direct sunlight. Sudden changes can cause wood movement and finish damage.
Structural issues, finish deterioration, or insect damage require professional attention. DIY repairs often reduce value and may cause irreversible damage. Professional restorers understand period-appropriate techniques and materials.
Remember: the goal is preservation, not perfection. Some signs of age and use are part of an antique's character and should be preserved rather than eliminated.
Navigate the complex world of wood stains with confidence. Understanding stain types, application techniques, and wood compatibility ensures professional-looking results for any furniture project.
Penetrating stains soak into wood fibers, enhancing natural grain patterns. Gel stains sit on the surface, providing more uniform color but may obscure grain details. Oil-based stains penetrate deeply but require longer drying times than water-based alternatives.
Different woods accept stain differently. Pine and other softwoods can blotch without pre-conditioner. Hardwoods like oak and ash showcase grain beautifully with penetrating stains. Maple and cherry may require gel stains for even coverage.
Consider the piece's intended environment and existing decor. Lighter stains make small spaces feel larger, while darker stains add richness and formality. Always test stains on hidden areas or scrap wood before committing to a color.
Apply stain with the grain using clean rags or brushes. Work in manageable sections to maintain wet edges. Remove excess stain within manufacturer-recommended time to prevent uneven color or prolonged drying.
Quality preparation is crucial for stain success. Proper sanding through progressive grits and thorough cleaning ensure optimal stain penetration and appearance.
Professional insights for maintaining your furniture
Always use coasters and placemats to protect wood surfaces from hot items. Heat can cause permanent white marks and finish damage that requires professional repair.
Wipe up spills immediately and maintain consistent humidity levels. Wood movement from moisture changes can cause joints to loosen and finishes to crack.
Dust weekly with microfiber cloths following the grain direction. Avoid harsh cleaners or excessive moisture that can damage finishes over time.
Get the latest restoration tips and project updates delivered to your inbox